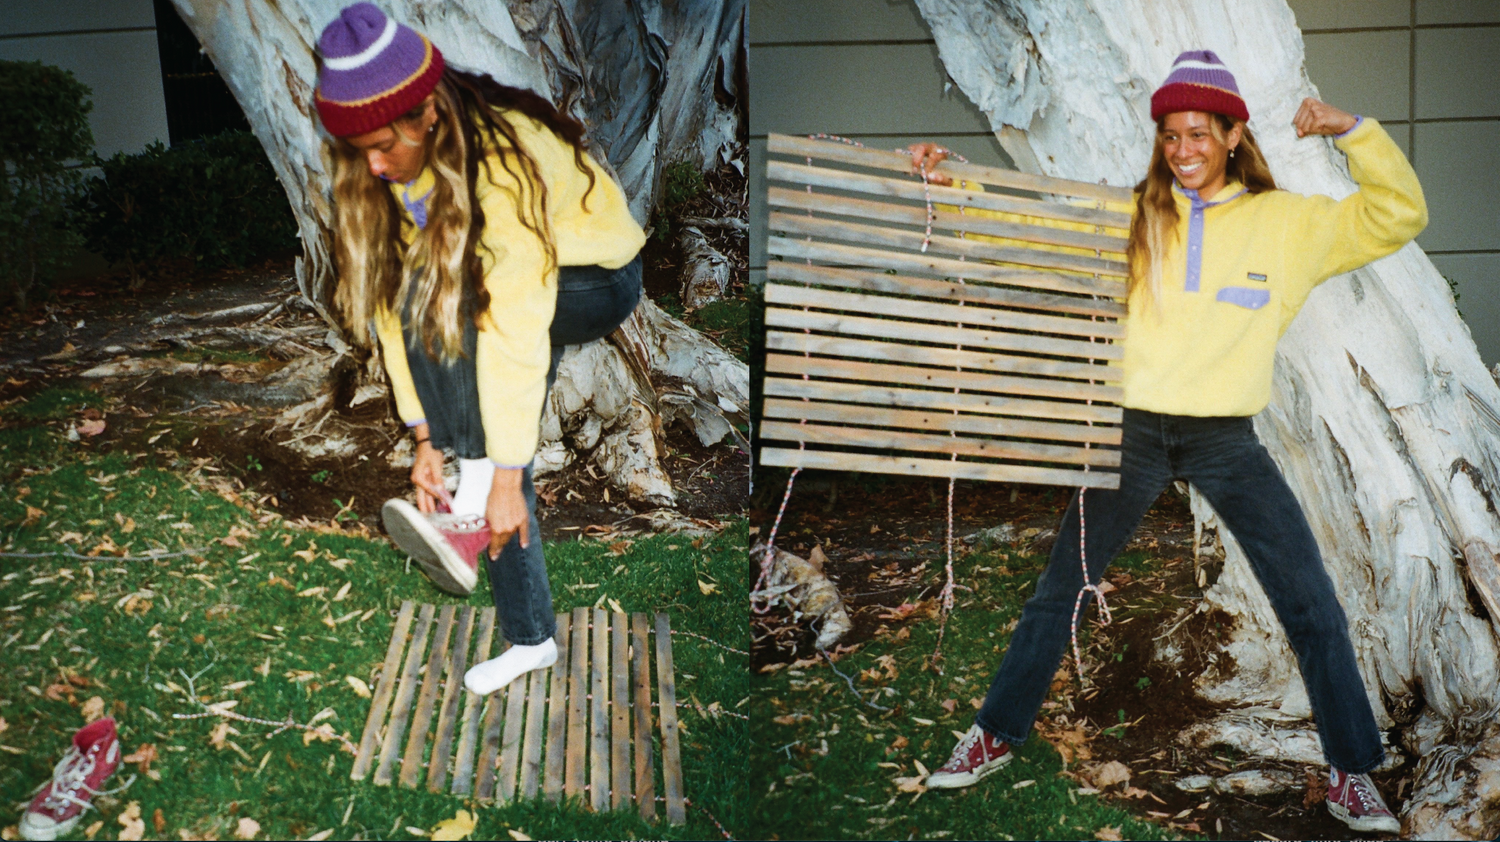
Trying to decide what to get your loved one or bestie for the holidays, but you're on a budget? The Seea team is on the same page! The team got together and learned how to make a DIY Changing Mat, and we are going to share all our tips and tricks with you! Follow along with this step-by-step guide and make your loved ones something that comes from the heart.
Time Required: 2 hours (possibly less if you get help from a friend!)
What You Will Need:
- Scrap Lumber (See Step 1 for details)
- Approximately 20’ of ¼” Diameter Rope
- Drill & Drill bit set (1/8" and 1/4")
- Saw (Chop Saws work great, but any saw will do)
- Cordless sander (or a sheet of sandpaper if you want to a better workout)
- Tape Measure & Sharpie

What you will need.
Let's Get to Work
1. First, select the wood you’d like to use for this project. If you’re going to use your mat outdoors or down at the beach, pick a wood naturally resistant to moisture and decay like redwood or cedar. Both of these options look and smell great, too! If looking to utilize scrap wood, you can use whatever you’ve got, but you’ll need smaller dimension lumber to keep the mat light and easy to roll up. The mat we made is approximately a 30” x 30” square, and uses 1”x2” redwood furring strips upcycled from a summer gardening project. Regardless of wood type, you can vary the overall width and length to suit your own preferences.

Choose your wood and mark the desired length.
2. Once you’ve chosen your dimensions, mark the wood and start cutting. A small mat might use a couple dozen identical length strips, so a stationary chop saw is the best tool for the job, as it’s quick and easy, and keeps your hands away from the blade. A circular or skill saw could also be used in a pinch – they just require a touch more attention and skill to keep the cuts safe and straight.

Cut the wood.
3. Once all your cuts are finished, lay the pieces out side by side, leaving a ¼” between each piece. If you’re happy with the basic layout, then grab your sharpie and start marking where the holes for the rope will go. To keep the locations consistent, lay all the pieces on their side and line them up using a straight edge or a wall as a reference. For our project we used three pieces of rope to hold the slats together. One running straight down the center line, and one about three inches from each end, so that the wood doesn’t split when you drill the holes.

Mark your holes.
4. Ok, let’s get to drilling! Grab your drill (or two drills if you’re lucky!) and start by making small pilot holes on all your marks using a 1/8” drill bit. When drilling with small, thin drill bits, it’s very easy to break them off inside, so just go slow, let the drill do the work, and do your best to guide the bit straight through the wood. Give yourself some grace here and have fun with it, as drilling a “straight” hole is a tricky thing to master. Once you’re finished with the pilot holes, swap in the ¼” drill bit, and enlarge each hole, being sure to run the bit through the hole a few times to clear out all the debris. 
Drill your holes.
5. Now that the sawing and drilling is finished, you’re ready to start sanding! Use an electric or cordless sander and knock down the edges on the end cuts, and smooth out the top and bottom surfaces to your liking (bare feet don’t like splinters!). If you don’t have a sander – no worries – a sheet of sandpaper will work just fine. Just wrap the paper around one or your off-cuts, abrasive side out, and poof! You’ve got one of carpentry’s oldest tools – a sanding block!

Sand the wood.
6. At this point, you should have everything cut, drilled, sanded, and laid out in front of you. Grab your rope and make sure you have enough for three identical lengths, with each length being roughly twice as long as the dimensions of the mat. For example, a 3’ wide mat would require each length to be 6’ long, so with three identical lengths, you’d need a total of 18’ of rope.
7. Make a double knot a few inches in from the end of each rope, and start passing the rope through the holes of the first board. If the rope is too big to fit through the hole, then enlarge the hole (if possible), or you’re using nylon rope, try melting the end slightly so that it will pass through the holes easier. Once you get all three ropes through the first board, make another series of single knots (the knots serve as the spacers between each piece of wood) and continue down the line, assembling the mat piece by piece. Check each row of knots before you add the next board, and before long, you’ll be done! 
String the pieces together with knots in between.
8. When you reach the end, there should be some extra length of rope left over, so if you want to get extra fancy, you can make a loop at the end of that rope, so that when you roll up the mat, you can pull the loose rope end back through the loop to keep it safe and secure. 
The finished changing mat!
That’s it! Hope you have as much fun as we did with this project. Be on the lookout for more DIY surf projects, coming soon! 
Your changing mat is ready to go!
MORE DIYS


